
Are you someone who has considered getting yourself weaves but always wondered about the fact that weaves may not look as natural and realistic?
Well, what if I told you that there is a way out, there is a way to make your weaves look absolutely natural and realistic looking – get invisible part weaves!
This article will talk about what invisible part weaves are, their types, how to fix them and will also answer some of your FAQs about hair weaves.
Let’s get into the details!
Related: Brazilian body wave Vs loose wave
Related: What hair density to choose
Page Contents
What Is An Invisible Part Weaves
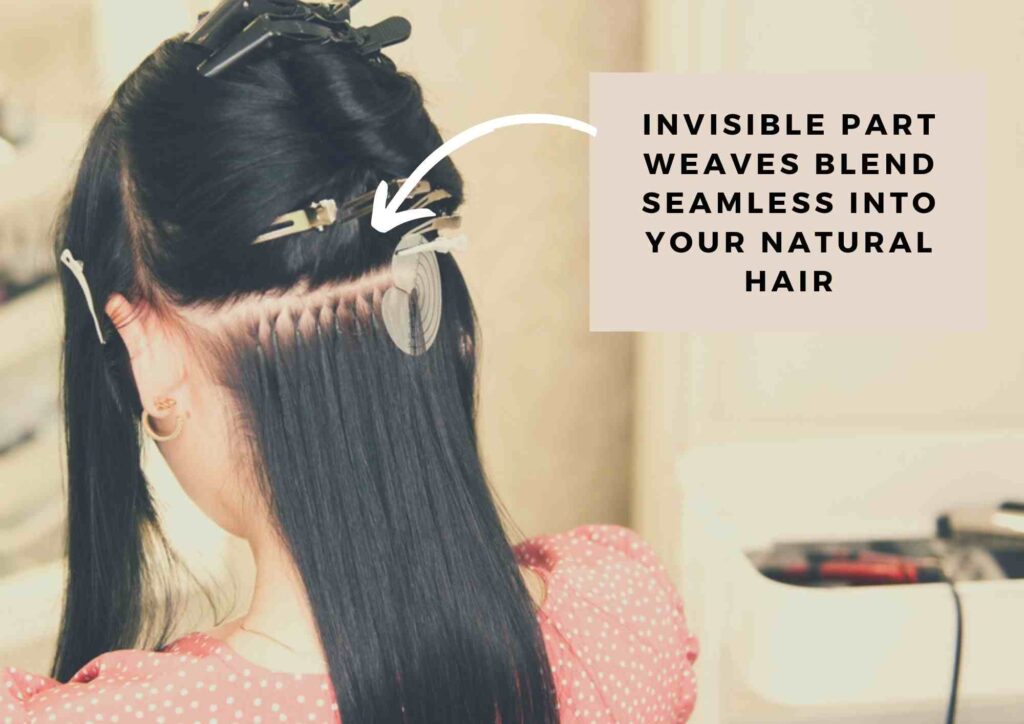
Invisible part weaves are now very trendy and are used by many people all over the world.
These weaves use a layering technique where the attachments are completely invisible and the base of the hair extension is not seen.
So your weaves look like they are natural and part of your own scalp.
These invisible part weaves use an ‘invisiweave’ method where the attached parts are fixed inside of the weave.
So that when the hair is styled, worn up into a bun or ponytail or even left loose, they will not be seen.
Types of invisible part weaves
There are two main types of invisible part weaves – the glue-in invisible part weave and sew-in invisible part weave. Each has it’s own merits and demerits as I’ve explained below.
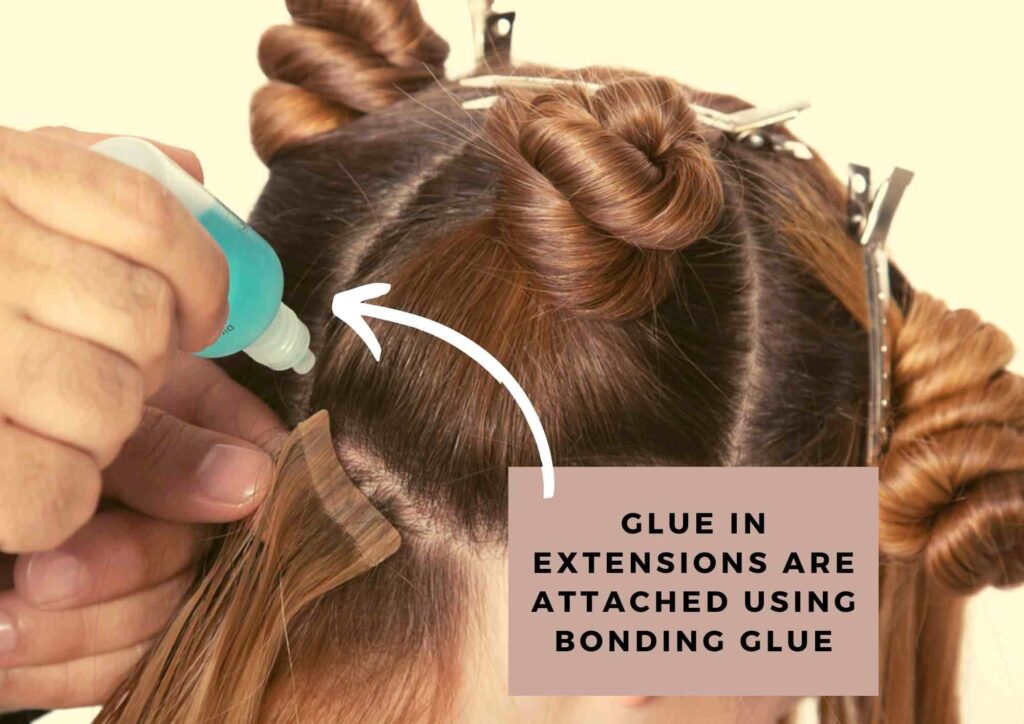
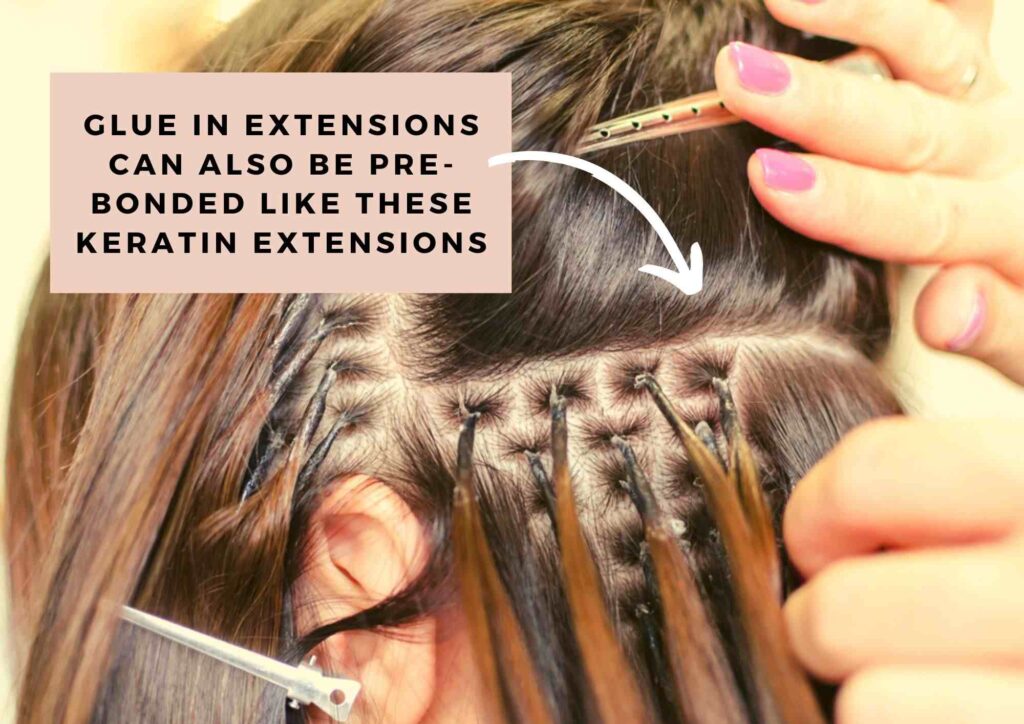
Glue-in Invisible Part Weaves Method
There are people who prefer the sew-in method of getting their invisible part weaves fixed.
But there are some others who choose the glue-in technique as this technique gives you an added advantage of being able to set the weave tracks closer to each other.
This is much easier as compared to the sew-in method that can only follow the tracks that have been braided.
Therefore, for those people with receding hairlines or bald patches in the areas of parting, choosing to use the glue-in technique is more recommended.
The glue-in technique will help you set the tracks closer and cover up your bald patches
How to Use Glue-in Invisible Part Weaves
Things you will need:
- A stocking cap: Make sure to buy the same coloured stocking cap as the colour of your scalp. For those who do not get the same coloured one, settling for a neutral colour and thereafter using a concealer will do the trick, to match up to the colour of your scalp.
- Weave bonding glue
- Holding gel
- Weave tracks
- A pair of scissors to cut the stocking and style your weaves (if need be).
- A brush to comb your weaves
Method of setting:
Step 1: Hair wash and detangling
Washing your hair with a mild shampoo and conditioner and letting your hair dry naturally will be ideal. (For those who like to leave on their weaves for a couple of weeks, then washing your hair is recommended). Then get rid of all the tangles, so that the process will be easy.
Step 2: Application of the holding gel
Take a sufficient quantity of holding gel and apply it all over your hair and make sure to spread it evenly until all your hair strands are well coated and make sure to flatten your hair onto your scalp.
Step 3: Blow drying the wet hair
This step is very essential failing which the hair tracks could go through the stocking cap. Therefore dry up the layer of gel using a blow dryer.
Step 4: Put on the stocking cap
Make sure to wait until the gel on your hair has dried up. Then gently put on the stocking cap from the backside of your head.
Step 5: Fixing the tracks
Laying of the tracks should begin at the nape of your neck and to do this you can use the weave bonding glue.
Make sure to apply a very fine layer. Apply the layer of glue over the stocking cap and then fix the track and gently press it down until fixed properly.
Once you apply the glue, make sure to dry it up using a blow-dryer. Then continue the same process for fixing the rest of your tracks until you reach the area up to your ears.
Then, decide on where you want your parting and gently cut that portion of the stocking cap.
Then lastly, to cover up the parted section, this step is very important and doing it right is essential.
Now, you will have to start placing the tracks in the opposite direction that you did earlier so that the weaves fall at the sides of your face.
Continue this process and as you reach the hair closer to the crown, make sure to start angling your weaves to look more natural. (You can refer to the image above for a better idea).
Working on the direction you are placing the weaves in is very important.
Tip: Cut the weaves or separate and work with smaller portions in order to get the best angle and more flexibility when setting the portion at the top of your head and the parted section.
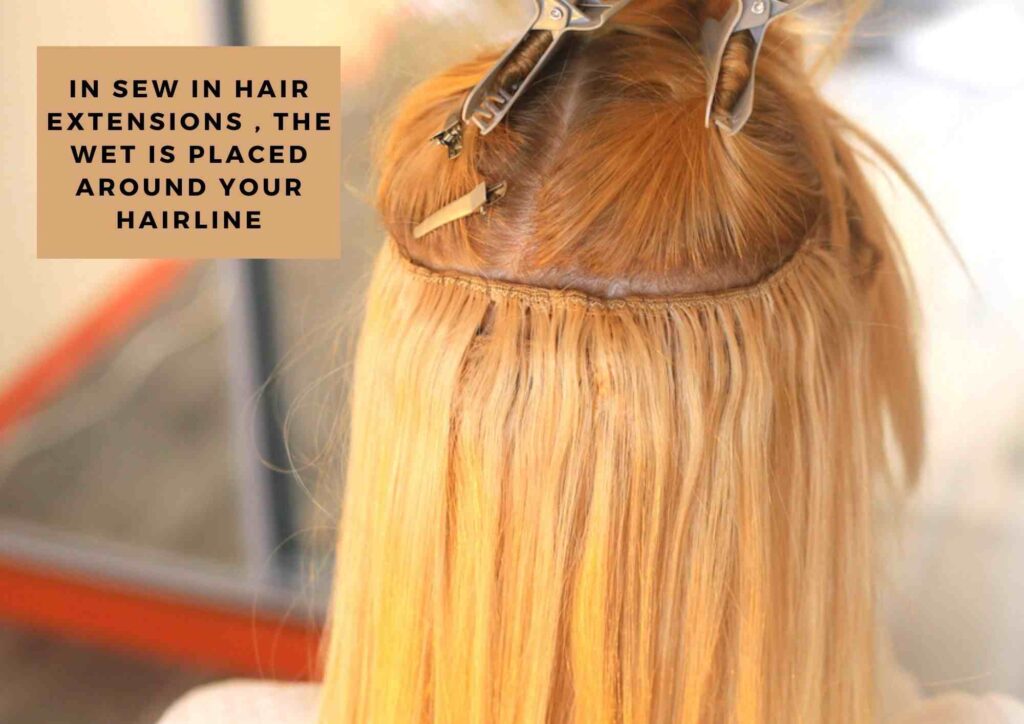
Sew- in Invisible Part Weaves Method
A lot of people chose the sew-in weave method like those with thicker hair types and some of those who feel like the glue could damage their hair, if it isn’t used in the right manner.
A lot of people often consider this method easier and safer as compared to the glue-in method.
But that being said, it is essential to note that there can be a very limited number of tracks which will be able to be set.
Also, these part weaves will require precision and skill in the sewing method failing which it will result in bald or patches of scalp skin being visible.
How to Use Sew-in Invisible Part Weaves
Things you will need:
- Weave tracks (also known as wefts or weaves)
- A pair of scissors (to the cut the weaves as per your requirements)
- Bonding glue (if required for covering up noticeable patches)
- Holding gel (if required to flatten out the hair)
- Sew-in thread (matching the colour of your weaves
- A weave sewing needle or weaving needle

Step 1: Hair wash and detangling
Washing your hair with a mild shampoo and conditioner and letting your hair dry naturally will be ideal.
For those who like to leave on their weaves for a couple of weeks, then washing your hair is recommended. Then get rid of all the tangles, so that the process will be easy.
Step 2: Partition your hair
This step is important, as partitioning your hair will give you a better idea on which direction you should braid your hair.
Step 3: Braiding of the hair into cornrows
Make sure that your hair stands very flat and close to the scalp in order for the wefts to look natural and realistic.
This is when you braid your hair into cornrows, where you begin at the front of your head, closer to the parting and make your way down all the way to the nape of your neck.
Step 4: Sew-in the weaves
This part has to be done right, so be slow and steady and make sure to not sew-in the weaves too tight, as it can tug heavily on your natural hair strands and cause it to get permanently damaged.
Begin with measuring the weaves as per the length of each cornrow and cut the weaves accordingly before you begin to sew them onto your cornrows.
The sewing in part is done by using the regular and basic stitching techniques to attach each weave onto the cornrow braids.
The stitching of each weave has to be down until the end, so that absolutely no portion of the cornrow is noticeable.
Make sure to sew-in the weaves in the right direction to make the hair look perfectly natural and realistic.
Step 5: Covering up
There are possibilities of certain areas where the scalp skin is being exposed.
Well, for those who find the need to cover up that area, in case it looks too noticeable, then you can use some bonding glue to fix in the small portions of weaves in order to cover it up.
Once you apply the glue, make sure to dry it up using a blow-dryer.
Tip: In case you find certain strands of hair not falling in place, use some holding gel to lay it flat on your scalp. Make sure to blow-dry the holding gel once it is applied.
Frequently asked questions (FAQs) about using hair weaves:
1. Can you wash hair weaves?
Yes, hair weaves can most definitely be washed by soaking them with regular shampoo and conditioner just like you would wash your natural hair.
2. Which technique is better glue-in or sew-in?
Well, this is a matter of personal choice and requirements. This being said, the glue-in method is often used by people with thinner hair types and those with bald patches and receding hairlines because the glue-in technique will let you be able to place the weave tracks closer, as compared to the sew-in method that lets you sew-in the weaves to the cornrow braids.
3. Does using weaves ruin one’s natural hair?
For those using the glue-in method, it is essential to use a stocking cap and not directly glue the weave tracks to your hair as the glue can damage your hair permanently.
For those choosing to sew-in the weave tracks, there is a risk that the weave tracks can tug at the natural hair strands over time and cause damage to the natural hair.
Therefore a gap should be maintained between changing weaves and having a gap of a minimum of 3 weeks between changing weaves is recommended.
4. Do sew-in weaves last a long time?
Yes, they last relatively longer than glue-in weaves. With regular salon maintenance, you can keep them on for 6 to 10 weeks.
The final takeaway
Many people often wonder whether invisible part weaves look “natural” and realistic.
Well, I would like to say that, apart from personal perspective, the way and method setting these weave tracks are very essential in giving you the final look, in order to make it look perfectly “natural” and realistic.
Nevertheless, give invisible part weaves a shot, because why not?
Also Read:
What length hair extension should I get
Stylish quick weave hairstyles
Best human hair vendors on Aliexpress

Helen is committed to bringing you the latest popular hairstyles, hair care tips, and hair-related products. You can check more of her work on besthairlooks to find fashion inspiration, product reviews, tutorials and more!